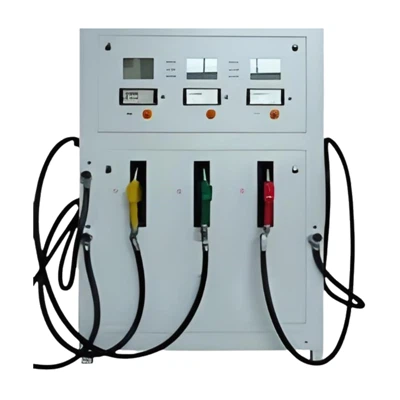
Maintaining the cleanliness of a self-bunded fuel tank is crucial for ensuring the quality of the stored fuel and the longevity of the tank itself. As a reputable self-bunded fuel tank supplier, I understand the importance of proper tank cleaning procedures. In this blog post, I will share a comprehensive guide on how to clean a self-bunded fuel tank effectively.
Understanding Self-Bunded Fuel Tanks
Before delving into the cleaning process, it's essential to understand what self-bunded fuel tanks are. Self-bunded fuel tanks are double-walled storage tanks designed to prevent fuel spills and leaks. The inner tank holds the fuel, while the outer tank acts as a secondary containment system. These tanks are commonly used for storing petrol and diesel and are available in various sizes and configurations. You can explore our range of Self Bunded Petrol Fuel Tank and Self Bunded Diesel Fuel Tank on our website.


Pre-Cleaning Preparations
- Safety First: Cleaning a fuel tank involves working with potentially hazardous materials. Therefore, it's crucial to prioritize safety. Wear appropriate personal protective equipment (PPE), including gloves, safety glasses, and a respirator. Ensure that the work area is well-ventilated to prevent the accumulation of fuel vapors.
- Empty the Tank: Before cleaning, completely empty the fuel tank. This can be done by transferring the fuel to another approved storage container. Make sure to follow all local regulations and guidelines when handling and transferring fuel.
- Isolate the Tank: Disconnect the tank from any fuel lines, pumps, or other equipment. This will prevent any accidental spills or leaks during the cleaning process.
- Inspect the Tank: Conduct a thorough visual inspection of the tank to identify any signs of damage, corrosion, or debris. Look for cracks, holes, or rust spots on the tank walls and bottom. If any significant damage is detected, it may be necessary to repair or replace the tank before cleaning.
Cleaning the Inner Tank
- Remove Loose Debris: Use a high-pressure water jet or a vacuum cleaner to remove any loose debris, such as dirt, rust, or sediment, from the inner tank. Start from the top of the tank and work your way down to the bottom. Pay special attention to the corners and edges of the tank, where debris tends to accumulate.
- Flush the Tank: Fill the tank with a cleaning solution, such as a mild detergent or a specialized tank cleaner. Use a pump or a hose to circulate the cleaning solution throughout the tank for at least 30 minutes. This will help to dissolve any stubborn dirt, grease, or contaminants.
- Scrub the Tank: After flushing the tank, use a long-handled brush or a scrubber to scrub the inner walls and bottom of the tank. This will help to remove any remaining dirt or debris. Pay close attention to areas that are difficult to reach, such as the seams and welds.
- Rinse the Tank: Once the tank has been scrubbed, drain the cleaning solution and rinse the tank thoroughly with clean water. Use a high-pressure water jet or a hose to ensure that all traces of the cleaning solution are removed from the tank.
- Dry the Tank: After rinsing, allow the tank to dry completely. This can be done by leaving the tank open to the air or by using a fan or a heater to speed up the drying process. Make sure that the tank is completely dry before refilling it with fuel.
Cleaning the Outer Tank
- Remove Debris: Use a broom or a brush to remove any loose debris, such as leaves, dirt, or grass, from the outer tank. Pay special attention to the top of the tank and the area around the access hatches.
- Wash the Tank: Use a mild detergent and a hose to wash the outer tank. Start from the top of the tank and work your way down to the bottom. Pay special attention to areas that are exposed to the elements, such as the sides and bottom of the tank.
- Inspect the Outer Tank: After washing the tank, conduct a visual inspection of the outer tank to identify any signs of damage, corrosion, or leaks. Look for cracks, holes, or rust spots on the tank walls and bottom. If any significant damage is detected, it may be necessary to repair or replace the tank.
- Repair the Outer Tank: If any damage is detected on the outer tank, it's important to repair it as soon as possible. This can be done by using a patch kit or by welding the damaged area. Make sure to follow all manufacturer's instructions and safety guidelines when repairing the tank.
Post-Cleaning Checks
- Inspect the Tank Again: After cleaning and drying the tank, conduct a final visual inspection of the tank to ensure that it is clean and free of any debris or contaminants. Look for any signs of damage or corrosion that may have been missed during the initial inspection.
- Test the Tank: Before refilling the tank with fuel, it's important to test the tank for leaks. This can be done by filling the tank with water and checking for any signs of leakage around the seams, welds, or fittings. If any leaks are detected, it may be necessary to repair the tank before using it.
- Refill the Tank: Once the tank has been inspected and tested, it's safe to refill it with fuel. Make sure to use clean, high-quality fuel that meets the manufacturer's specifications. Avoid overfilling the tank, as this can cause spills or leaks.
Maintenance Tips
- Regular Inspections: Conduct regular visual inspections of the fuel tank to identify any signs of damage, corrosion, or leaks. This should be done at least once a month or more frequently if the tank is used frequently.
- Proper Storage: Store the fuel tank in a clean, dry, and well-ventilated area. Avoid exposing the tank to extreme temperatures, direct sunlight, or harsh chemicals.
- Fuel Quality: Use clean, high-quality fuel that meets the manufacturer's specifications. Avoid using fuel that has been contaminated or stored for an extended period of time.
- Filter Replacement: Replace the fuel filters regularly to prevent dirt, debris, and contaminants from entering the tank. This will help to maintain the quality of the fuel and the performance of the tank.
Conclusion
Cleaning a self-bunded fuel tank is an important part of maintaining its performance and longevity. By following the steps outlined in this guide, you can ensure that your fuel tank is clean, safe, and free of any contaminants. Remember to prioritize safety at all times and to follow all local regulations and guidelines when handling and cleaning fuel tanks. If you have any questions or need further assistance, please don't hesitate to contact us. We are a leading Self Bunded Diesel Tank supplier and are committed to providing our customers with the highest quality products and services. Whether you are looking to purchase a new fuel tank or need help with tank cleaning and maintenance, we are here to help. Contact us today to discuss your requirements and to learn more about our products and services.
References
- American Petroleum Institute (API). (2019). API Standard 653: Tank Inspection, Repair, Alteration, and Reconstruction.
- National Fire Protection Association (NFPA). (2018). NFPA 30: Flammable and Combustible Liquids Code.
- Occupational Safety and Health Administration (OSHA). (2012). OSHA Standard 29 CFR 1910.106: Flammable and Combustible Liquids.