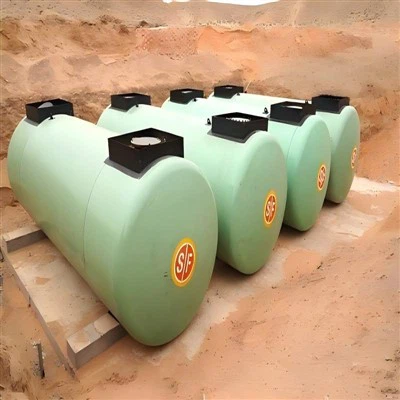
Hey there! As an above ground fuel tank supplier, I often get asked about how to install a vent pipe on an above ground fuel tank. It's a crucial part of the setup, and getting it right is super important for the safety and proper functioning of your tank. So, let's dive into it!
Why Do You Need a Vent Pipe?
First off, you might be wondering why a vent pipe is necessary. Well, when fuel is pumped into or out of the tank, the air inside the tank needs to be able to escape or enter. Without a vent pipe, pressure can build up or create a vacuum inside the tank, which can lead to all sorts of problems. It can cause the tank to deform, affect the fuel flow, and even pose a safety risk. So, a vent pipe is essential to maintain the right pressure inside the tank.
Choosing the Right Vent Pipe
The first step in installing a vent pipe is choosing the right one. You need to consider a few things here. The material of the vent pipe is important. It should be made of a material that can withstand the fuel and the environmental conditions. For most above ground fuel tanks, a high - density polyethylene (HDPE) or stainless - steel vent pipe is a good choice. HDPE is lightweight, corrosion - resistant, and relatively inexpensive. Stainless steel, on the other hand, is more durable and can handle higher pressures.
The size of the vent pipe also matters. It needs to be large enough to allow air to flow freely in and out of the tank. A common rule of thumb is to use a vent pipe with a diameter of at least 1 - 1/4 inches for smaller tanks and 2 inches for larger tanks. You can find more detailed sizing guidelines in the manufacturer's specifications for your Above Ground Diesel Fuel Tank or Above Ground Gasoline Fuel Tank.
Tools You'll Need
Before you start the installation, gather the necessary tools. You'll need a drill, a pipe cutter, a wrench, Teflon tape, and a vent cap. The drill is for making holes in the tank for the vent pipe. The pipe cutter is used to cut the vent pipe to the right length. The wrench is for tightening the fittings, and the Teflon tape is used to seal the connections to prevent leaks. The vent cap is important as it keeps debris and insects out of the vent pipe while still allowing air to flow.
Installation Steps
Step 1: Find the Right Location
The first thing you need to do is find the right location for the vent pipe on the tank. It should be installed at the highest point of the tank to ensure that air can escape easily. Most above ground fuel tanks have a pre - marked spot for the vent pipe. If not, you'll need to carefully measure and mark the location yourself. Make sure it's away from any sources of heat or ignition, like engines or electrical equipment.
Step 2: Drill the Hole
Once you've marked the location, use the drill to make a hole in the tank. The size of the hole should match the diameter of the vent pipe. Be careful not to drill too deep or damage the inside of the tank. You might want to use a drill bit that's specifically designed for the material of your tank.
Step 3: Install the Fitting
After drilling the hole, insert the fitting into the hole. The fitting is what connects the vent pipe to the tank. Use the wrench to tighten the fitting securely. Make sure to wrap Teflon tape around the threads of the fitting before tightening to prevent any fuel leaks.
Step 4: Cut and Connect the Vent Pipe
Cut the vent pipe to the appropriate length. You want it to extend above the tank to prevent any rain or debris from entering. Connect the vent pipe to the fitting on the tank. Again, use Teflon tape on the threads to ensure a tight seal.
Step 5: Install the Vent Cap
Finally, install the vent cap on the end of the vent pipe. The vent cap should be designed to allow air to flow freely while keeping out unwanted elements. Make sure it's securely attached to the vent pipe.
Safety Considerations
Safety is always a top priority when working with fuel tanks. Make sure the tank is empty or has very little fuel in it before you start the installation. If there's fuel in the tank, take extra precautions to avoid any sparks or open flames. Also, follow all local codes and regulations regarding the installation of vent pipes on above ground fuel tanks.
Maintenance
Once the vent pipe is installed, it's important to maintain it regularly. Check the vent pipe for any blockages, such as debris or ice in cold weather. Make sure the vent cap is in good condition and not damaged. If you notice any problems, like a leak or a blockage, address them immediately.


Conclusion
Installing a vent pipe on an above ground fuel tank is a relatively straightforward process if you follow the right steps. It's an important part of ensuring the safety and proper functioning of your tank. If you're still not sure about the installation process or have any questions, don't hesitate to reach out to us. We're an above ground fuel tank supplier, and we're here to help you with all your fuel tank needs. Whether you're looking for an Above Ground Diesel Tank or an above ground gasoline fuel tank, we've got you covered.
If you're interested in purchasing an above ground fuel tank or need more information about our products and services, feel free to get in touch with us. We'd be happy to discuss your requirements and help you find the perfect solution for your fuel storage needs.
References
- Manufacturer's manuals for above ground fuel tanks
- Local building and safety codes for fuel tank installations